

Having a scope adds a lot of versatility to a rife. Iron sights are good enough for some things, but a scope can dramatically increase your range and accuracy with your Ruger 10/22. Knowing how to install a scope will let you upgrade your existing sights. Plus, knowing how to do the installation yourself also makes it easier to make adjustments, clean your scope, or trade out for a better version later on.
Thankfully, installing a scope isn’t very difficult. Here’s what you need to know to safely install a new scope on your Ruger 10/22.
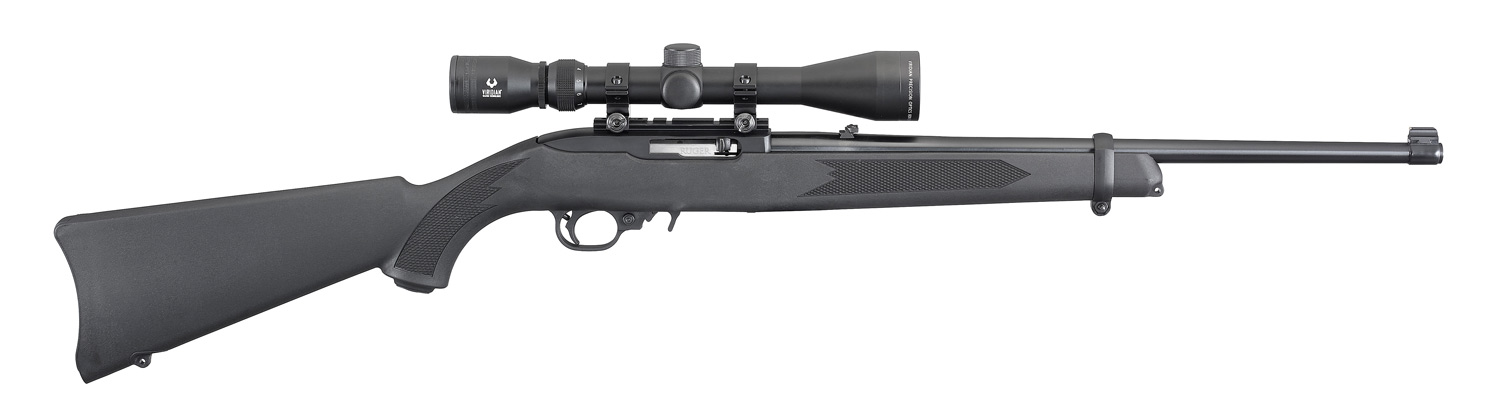
Steps to Mount a Scope On Your Ruger 10/22
Before you get started, you’ll need a flathead screwdriver, your scope, and an appropriate mount for your scope. Since installation is simple and quick you don’t need to do anything to prep your rifle before installation.
Step 1: Loosen the Plug Screws
On the top of your Ruger 10/22, unless you already have a scope installed, you should have a set of plug screws protecting the scope mounting slots. These screws help prevent rust and protect the threads inside the holes, which makes sure your scope will be held securely once it’s installed.
Since you have a scope mount and it’s included screws, you won’t need these anymore. Use your flathead screwdriver to remove them. We’d recommend storing the screws in a bag or an equipment box labeled with the gun they were taken from. That way you still have them if you ever decide to remove your scope and don’t have an immediate replacement.
Step 2: Install Your Scope Mount
Next, take your scope out and line it up with the mounting holes. Use the screws included with the scope to fasten it securely in place.
Remember, your scope’s mount needs to be fairly tight and secure to prevent shaking and loosening screws when you fire.
Step 3: Separate and Loosen Scope Rings
Your mount will have two different adjustable scope rings. These rings are what actually hold your scope in place, and your scope will have two areas to hold the rings securely and minimize shaking.
Move the rings into position, usually further apart than they are at first, and then loosen them enough to slide your scope through easily. Make sure your scope mount doesn’t rattle or shake on the rifle before moving to the next step. Rattling is a sign that the scope mount isn’t attached tightly enough to the stock.
Step 4: Place Your Scope, Position, and Tighten
The next step is relatively simple, you’ll simply place the scope through the scope rings. Look through the scope to make sure it’s positioned properly and rotate it so that the lines are horizontal and vertical. Your scope may indicate which line is supposed to be vertical and which line is horizontal, make sure you match that alignment so you can dial in the scope later.
Once your scope is in position, tighten the scope rings slightly. Once there’s just a little wiggle left in the scope, check its position one more time and make any final adjustments before fully tightening the scope.
Make sure your scope is right enough not to move or rotate with normal use, but not so tight that you’re putting too much pressure on the scope with the scope rings. Ideally, you don’t want to have to move or adjust your scope very often because you’ll need to dial it in every time you make adjustments.
See which are the best Ruger 10/22 scopes.
Step 5: Dial-In Your Scope
The last step to install any scope is to dial it in at a range. This is important because even the best installation will leave your scope slightly off from where your barrel sends ammunition. Some of this is because of the distance between the scope and the barrel and the difference in position. Dialing your scope in will take care of the discrepancy.
Plan on sending a lot of rounds downrange when you’re dialing in a scope. It takes a while to figure out where your scope is currently set, and you’ll want to make small adjustments until you have it on target. Most people dial their scopes in at 100 yds, but you can go closer or further away depending on how you want to use the scope.
Remember that the distance you’re dialed in changes how you aim for different distances. For instance, if you’re dialed in at 100 yds, you’ll need to aim slightly high to be on target at 200 yds.
Once you’re satisfied that your scope is dialed in, you’re ready to go. Most scopes benefit from being dialed in annually or biannually, but you may need to make slight adjustments more often if you do a lot of shooting or shoot a lot of rounds per session since your calibration will change slightly from the kick.

Mike Fellon is the founder of ScopesReviews and an optics specialist with 15+ years in precision shooting. A former Bass Pro Shops firearms advisor and NRA-certified instructor, he’s hands-tested 200+ rifle scopes across hunting and competition. Based in Dallas, Texas.